Getting Started
1. Select A Device
After startup, the tool opens the Select device page. The device table shows the detected devices and their status:
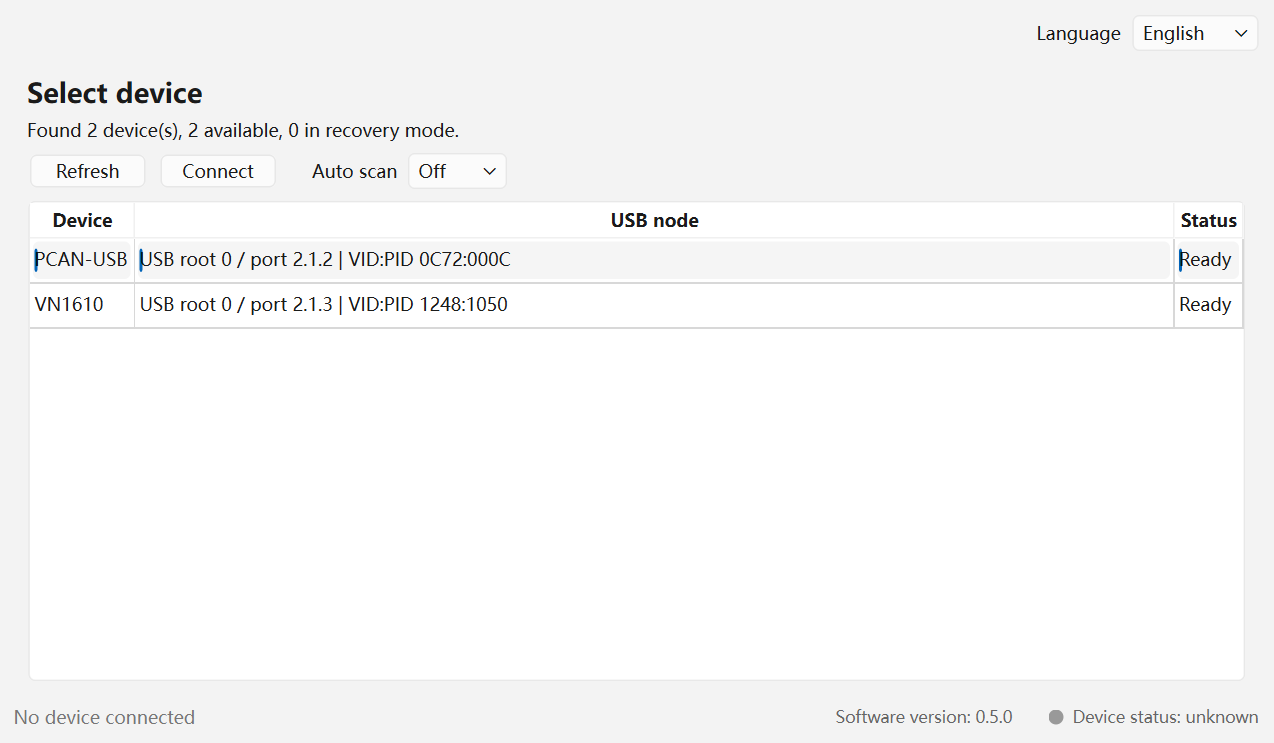
| Status | Meaning | Recommended Action |
|---|---|---|
Ready | The device can be opened | Select it and click Connect |
Recovery mode | The device is already in update-drive mode | Click Open recovery or reconnect the device |
Driver not installed | Windows cannot find a usable driver | Install the driver and click Refresh |
Unavailable | The device is busy or cannot be opened | Close other software that may be using it |
If the device is not listed automatically, click Refresh. For plug-and-unplug testing, enable Auto scan and choose a scan interval.
2. Connect
Select a device with the Ready status, then click Connect. After a successful connection, the main window opens.
If connection fails, check:
- Whether the USB cable and port are reliable.
- Whether another CAN tool or debugger is using the device.
- Whether Windows Device Manager reports a driver problem.
- Whether the selected device supports the CANmeleon management workflow.
3. Read Device Information
Open the Device page and click Refresh info. Common fields include:
Device: current device name.PID: product identification.Application version: legacy interface label for the currently running firmware version.Manager protocol: device management interface version.Bootloader version: bootloader version.Device type,Channels,Application slots, andInstalled application: legacy interface fields describing firmware slots and installed firmware.